There are two sides to shooting in Warhammer 40,000 – unleashing enormous amounts of dakka, and avoiding it. In this tactics article from the White Dwarf archive, Warhammer 40,000 expert Stephen Box talks cover, and how to use it to avoid your army being shot off the table.*
Stephen: Following on from my previous article about shooting, this instalment is all about gaining the Benefit of Cover.
The Benefit of Cover
Understanding line of sight (LoS), the terrain rules and how cover works can have a huge impact on your games of Warhammer 40,000. I’m not going to explain the rules for terrain here – you can find them on pages 44–48 of the Core Rules – but we are going to look at putting them into practice and what common pitfalls to be aware of.
As the attacker, how can you maximise your shooting to negate your opponent’s use of cover? As the defender, which models should you remove as casualties, in what order, and why? When it comes down to it, the Benefit of Cover is simple maths. A Fire Warrior in cover has a 66% chance of survival (against an AP 0 shot) compared to a 50% chance if they’re standing in the open. Those are much better odds!
In these examples, I’ve used Space Marines and T’au as our tactical guinea pigs (not a phrase I ever thought I’d say), though the tactics and rules we explore can, of course, be applied to any faction.
Wound Allocation in Cover
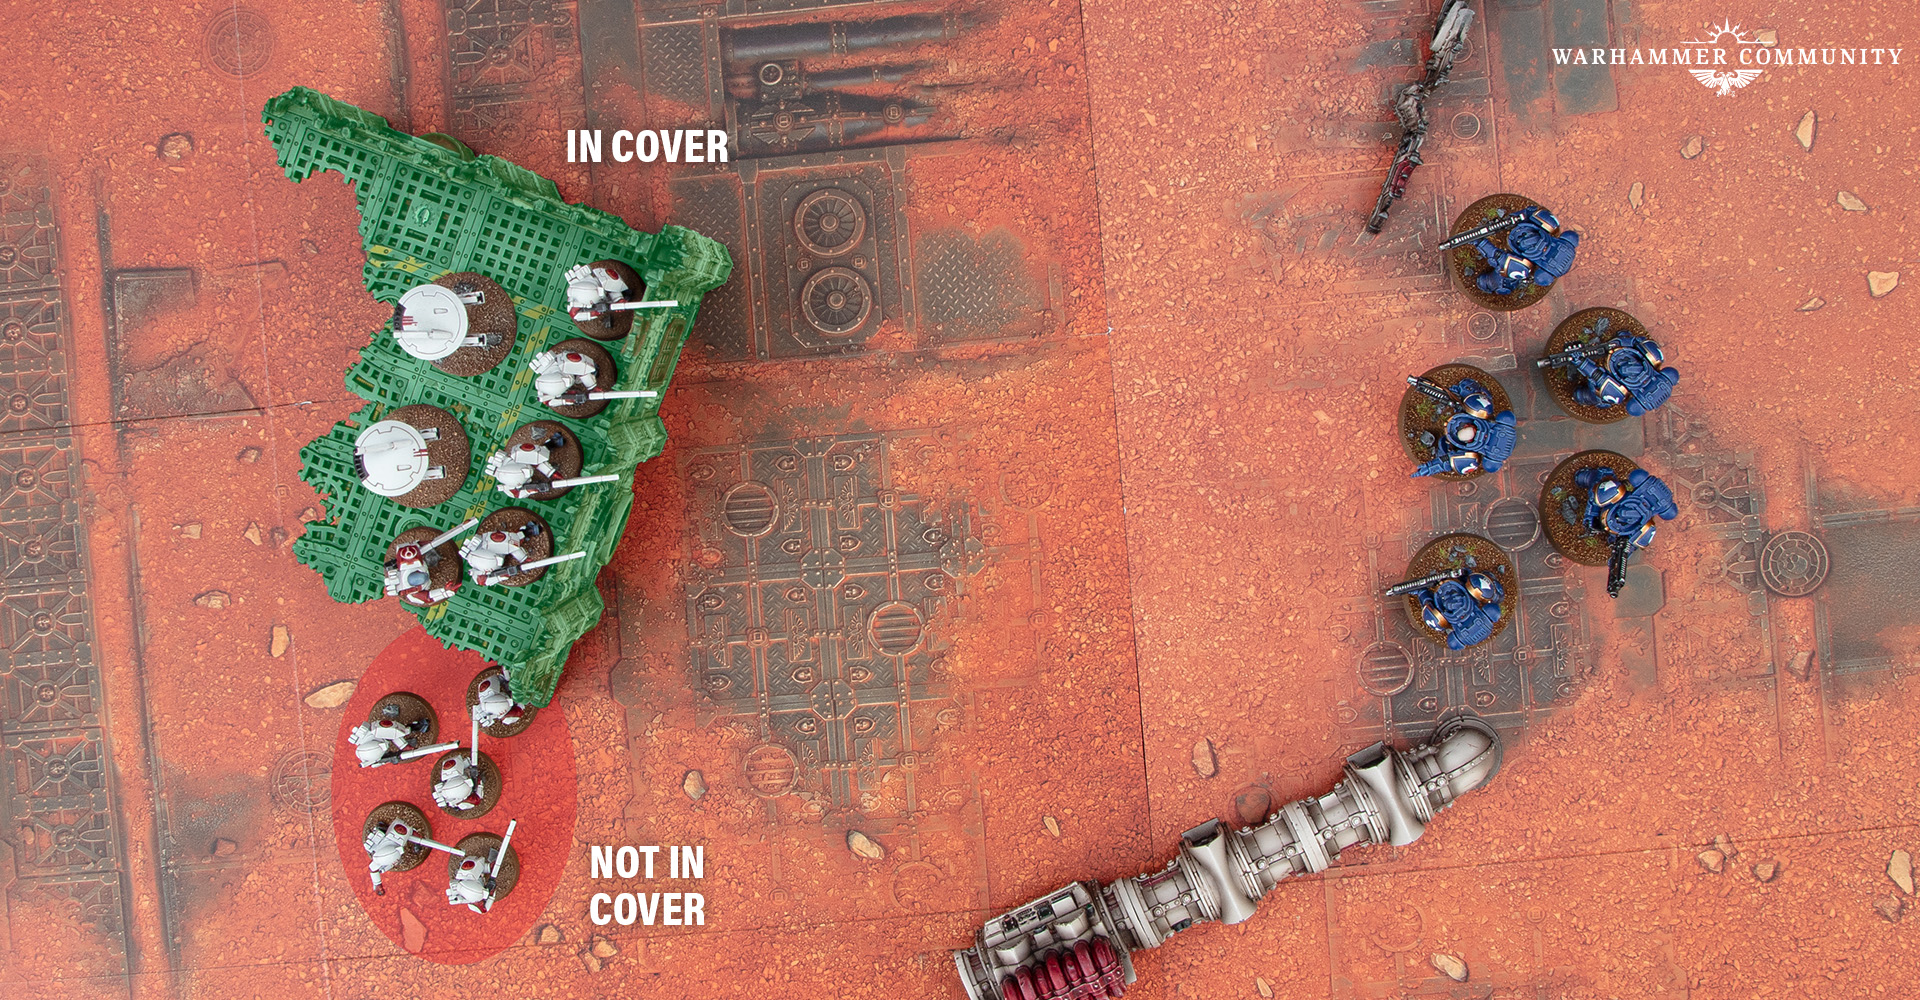
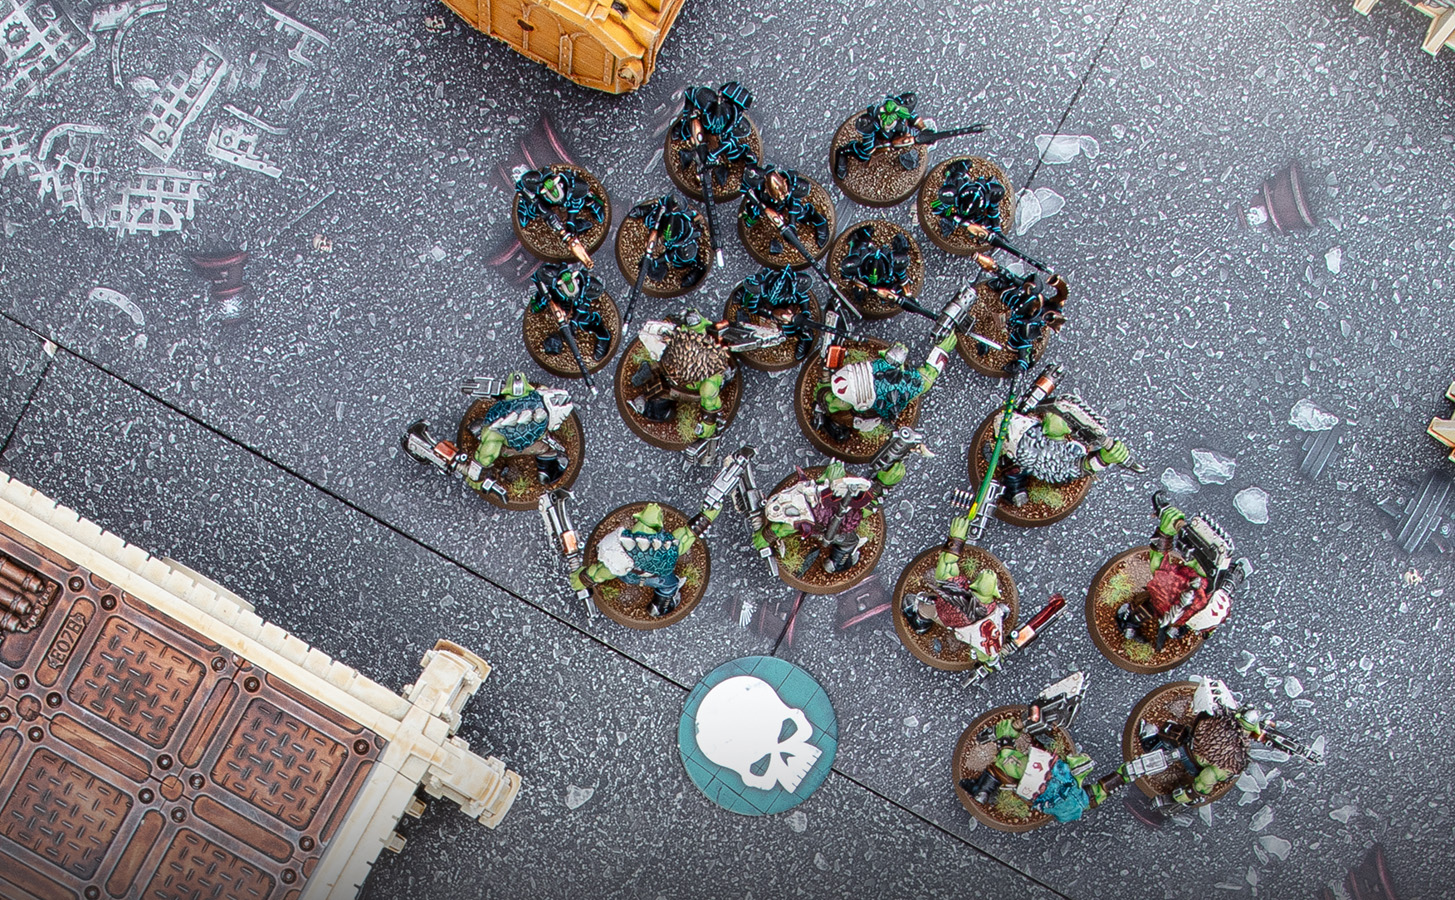
In this example, the Heavy Intercessors can draw line of sight to all of the Fire Warriors. The ones in the building have the Benefit of Cover, while those outside do not. The T’au Empire player chooses where wounds are allocated. If they allocate wounds to models not in cover, their save will be reduced to 5+, whereas those in cover will be able to mitigate the AP −1 from the Heavy Intercessors’ guns and make their saves on 4+.
Here, taking the saves on the models in cover is the best option. However, if the firing unit’s weapons ignore cover (heavy flamers, incinerators and the like), then it makes sense to remove models that aren’t in cover, as they wouldn’t gain the benefit of it in the first place.
Target Priority
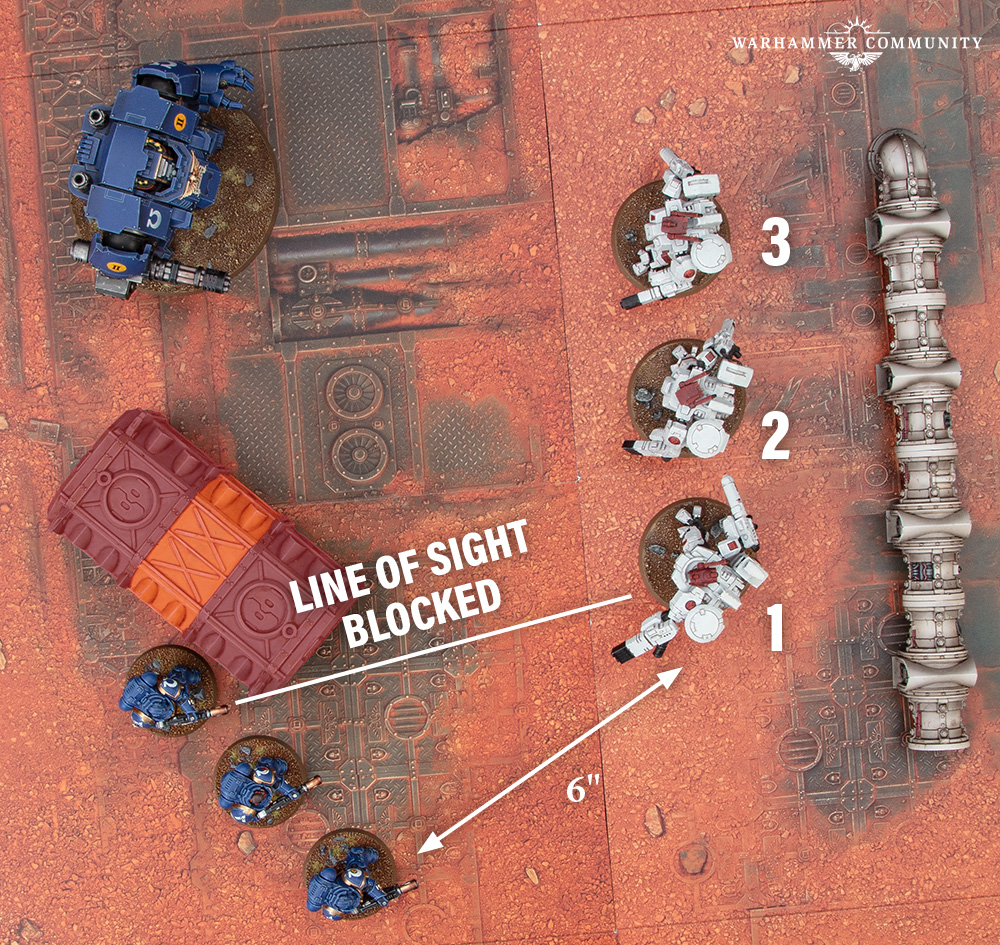
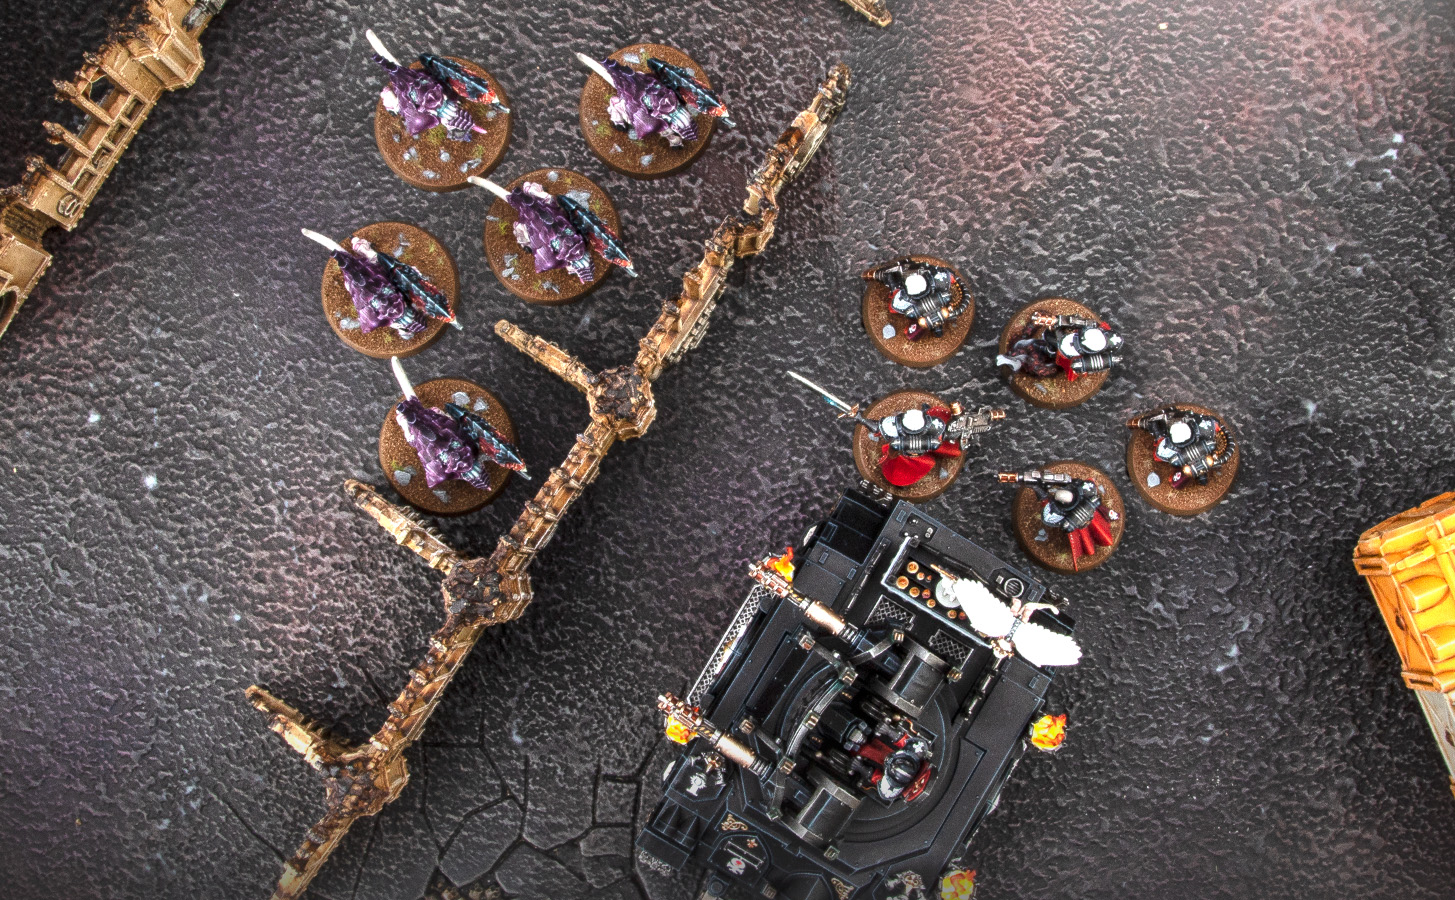
Here, the Crisis Battlesuits are being shot by two units – Eradicators and a Redemptor Dreadnought. If the Dreadnought shoots first and kills a Battlesuit, the T’au player could remove model 1 from the battlefield. This would prevent one of the Eradicators from shooting because he would then not be able to draw line of sight to models 2 and 3. And by taking model 1 off, the T’au player will ensure that their Battlesuits are not within half range of any of the Eradicators’ Melta weapons, thereby denying them the opportunity to cause extra damage. To prevent this, the Space Marines player should fire the Eradicators first.
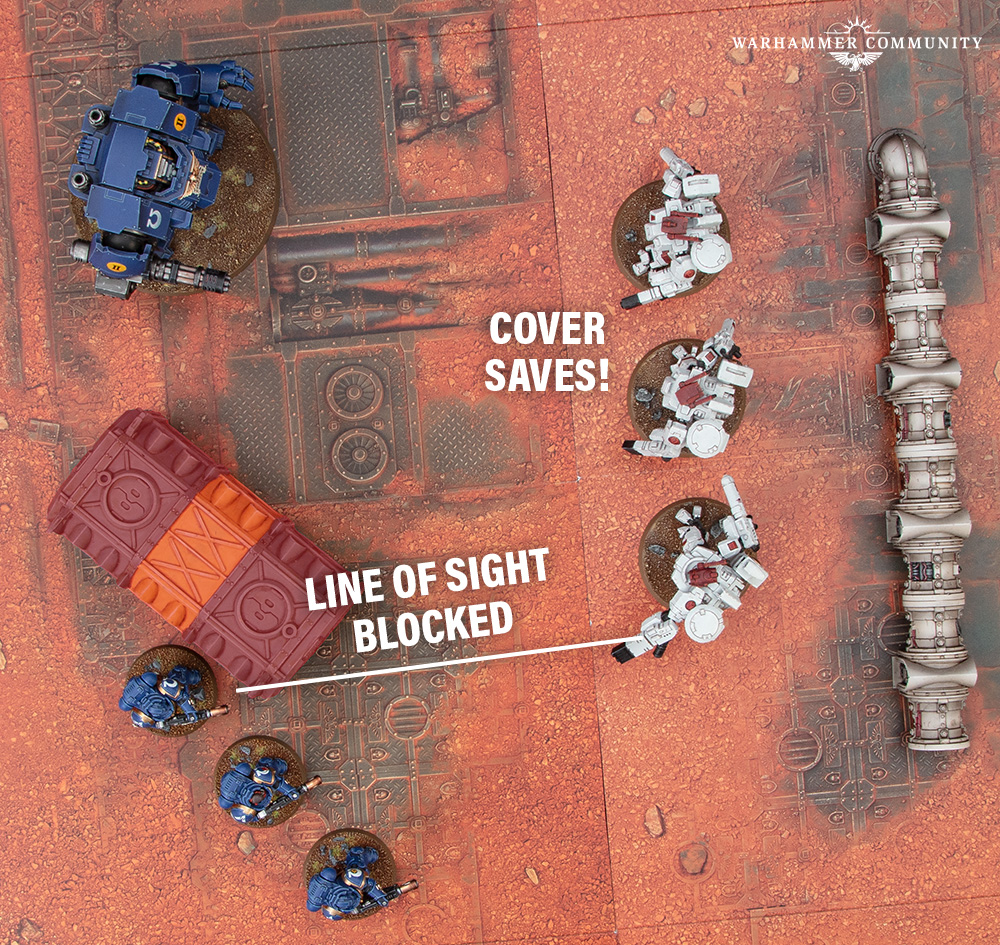
Continuing the example above, imagine that the Space Marines player does shoot with the Eradicators first. Because one Eradicator can’t draw line of sight to every model in the T’au unit, the Battlesuits count as being in cover to the Eradicators. This is crucial because against those AP −4 melta rifles they will still get a 6+ save. It may not be much, but it’s better than nothing and could see one of them survive to become a nuisance later on. Depending on the tactical situation across the battlefield, it might be worth moving the Eradicators so they can see every model in the unit fully and deny them any save at all.
Barricades and Fuel Pipes
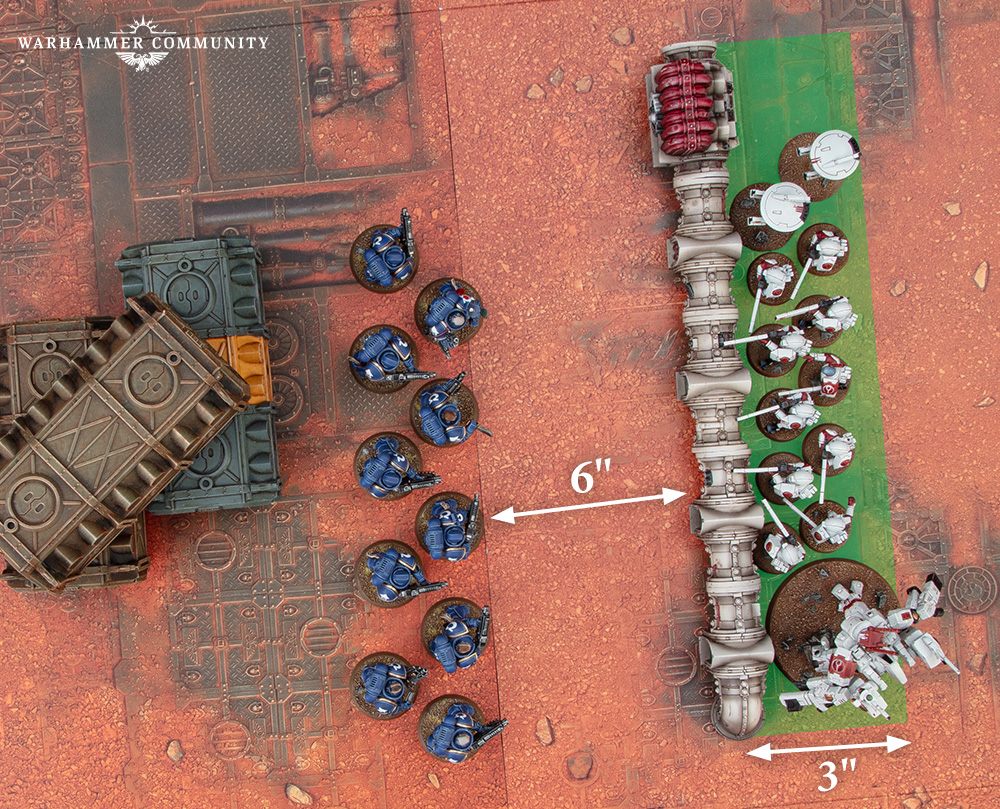
This time, a unit of Fire Warriors are taking cover behind a fuel pipe. The unit is wholly within 3" of it and not fully visible to the Intercessors, so they gain the Benefit of Cover. Note that the Battlesuit Commander will not gain the Benefit of Cover, as he does not have the Infantry keyword.
Some players make the mistake of thinking that if the Intercessors are also within 3" of the pipes, the Fire Warriors will not gain the Benefit of Cover. This is not the case as they are still only partially visible despite the close range. Also be aware that Engagement Range is 2" when fighting across a fuel pipe or barricade, so don’t get too close.
Tactical Positioning
The Space Marines player has moved their Dreadnought into a very good position. The Dreadnought is in tight behind the Armoured Containers, meaning it is hard to target from its left. However, the Dreadnought has been placed so that it can draw line of sight to all parts of the Battlesuit Commander’s base, which means it will not receive the Benefit of Cover from the Dreadnought’s shooting. If the Commander survives, however, the T’au player will have to move it all the way around to the right of the Dreadnought in order to draw line of sight to the whole model and therefore negate its Benefit of Cover.
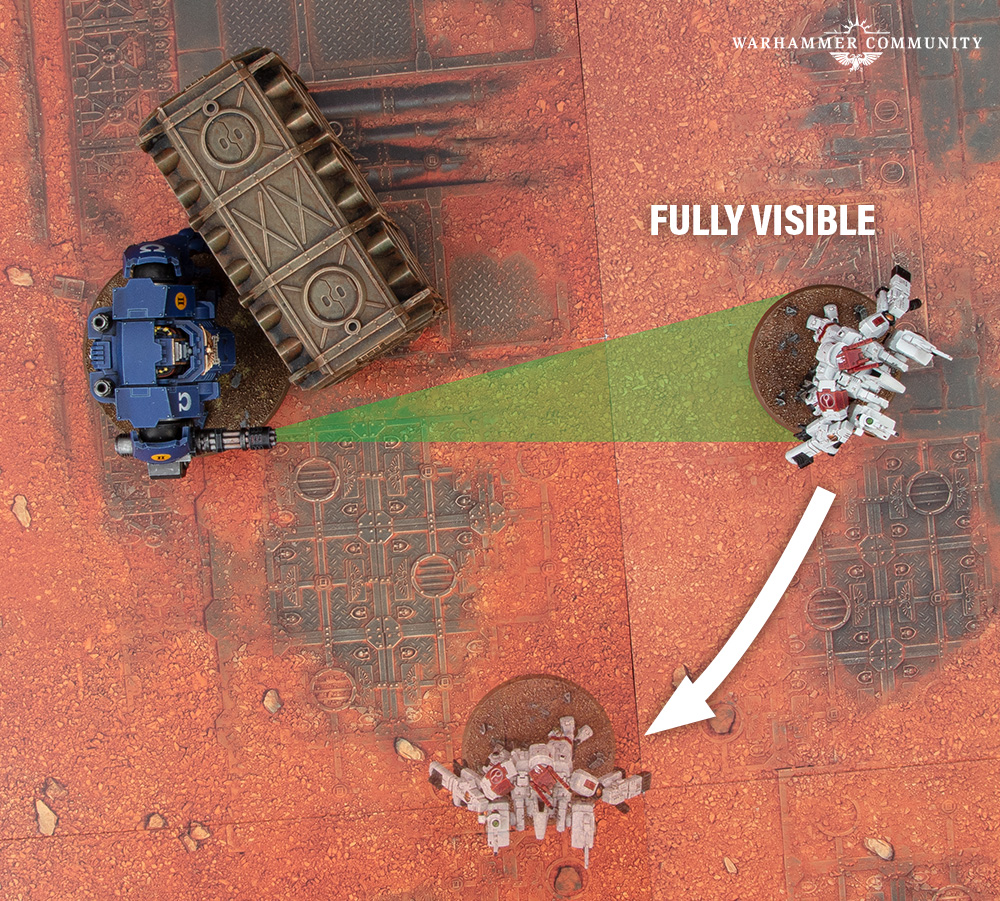
Visibility Through Woods
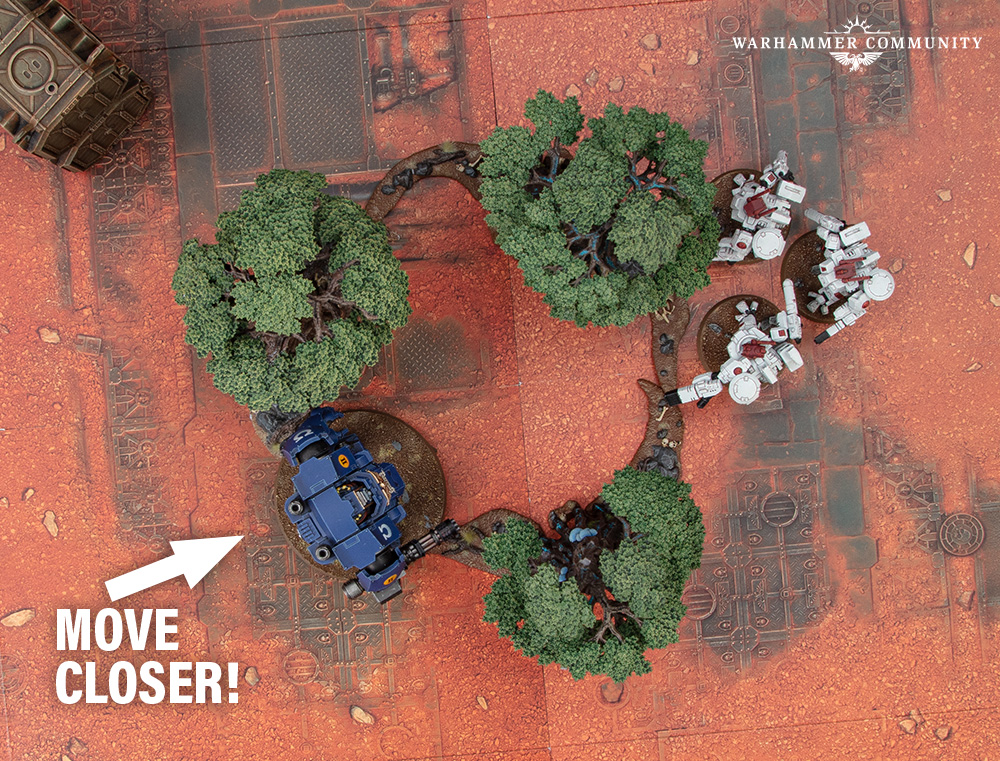
When shooting through woods, the target will gain the Benefit of Cover unless they are Aircraft or Towering. But a unit that is wholly within the woods can see out of them normally. In this example, the Dreadnought is not wholly within the woods, so the Battlesuits will gain the Benefit of Cover. If the Dreadnought had been placed 1" further forward and wholly within the terrain feature, the T’au would be fully visible. In return, the T’au have to look through the woods to see the Dreadnought, so it will have the Benefit of Cover – regardless of whether or not it is wholly within the terrain feature.
Stephen Box is a veteran Warhammer 40,000 player and a master tactician. He runs Vanguard Tactics, a website that helps people to think critically while remaining composed and confident in their ability to play Warhammer 40,000.
More in White Dwarf
A version of this article was originally published in White Dwarf issue 496. You can find in-depth content like this every month, so there's never been a better time to subscribe.
Subscribe now
*A few minor changes have been made for clarity.