In the last few weeks, we’ve reviewed moving and shooting in Warhammer 40,000 in a series of articles from the White Dwarf archive. Now it’s the turn of the Charge phase. Apparently it’s about more than just shouting “CHAAAAAARGE!” and rolling dice. Who knew? Warhammer expert Stephen Box did, and here’s what he has to say.
We have updated this article to take into account rules changes since it was first published.
Stephen: Contrary to popular belief, charging isn’t just about getting your models into combat. That’s arguably the top reason, but there are others too. We’ve previously explored why and how you should move your models to best effect and how important it is to stay mobile. The Charge phase is your second opportunity in a turn to move your units, which makes it very useful indeed!
So, here are four reasons to charge:
So your unit can destroy an enemy unit
So you can move your unit into range of an objective
So you can improve your board presence (which is crucial for some missions)
So your units can block enemy movements or tie them up in combat
We covered these gaming concepts in the movement article, so the training modules in this article will focus more on the things you should consider before charging, when charging, after charging or even when being charged.
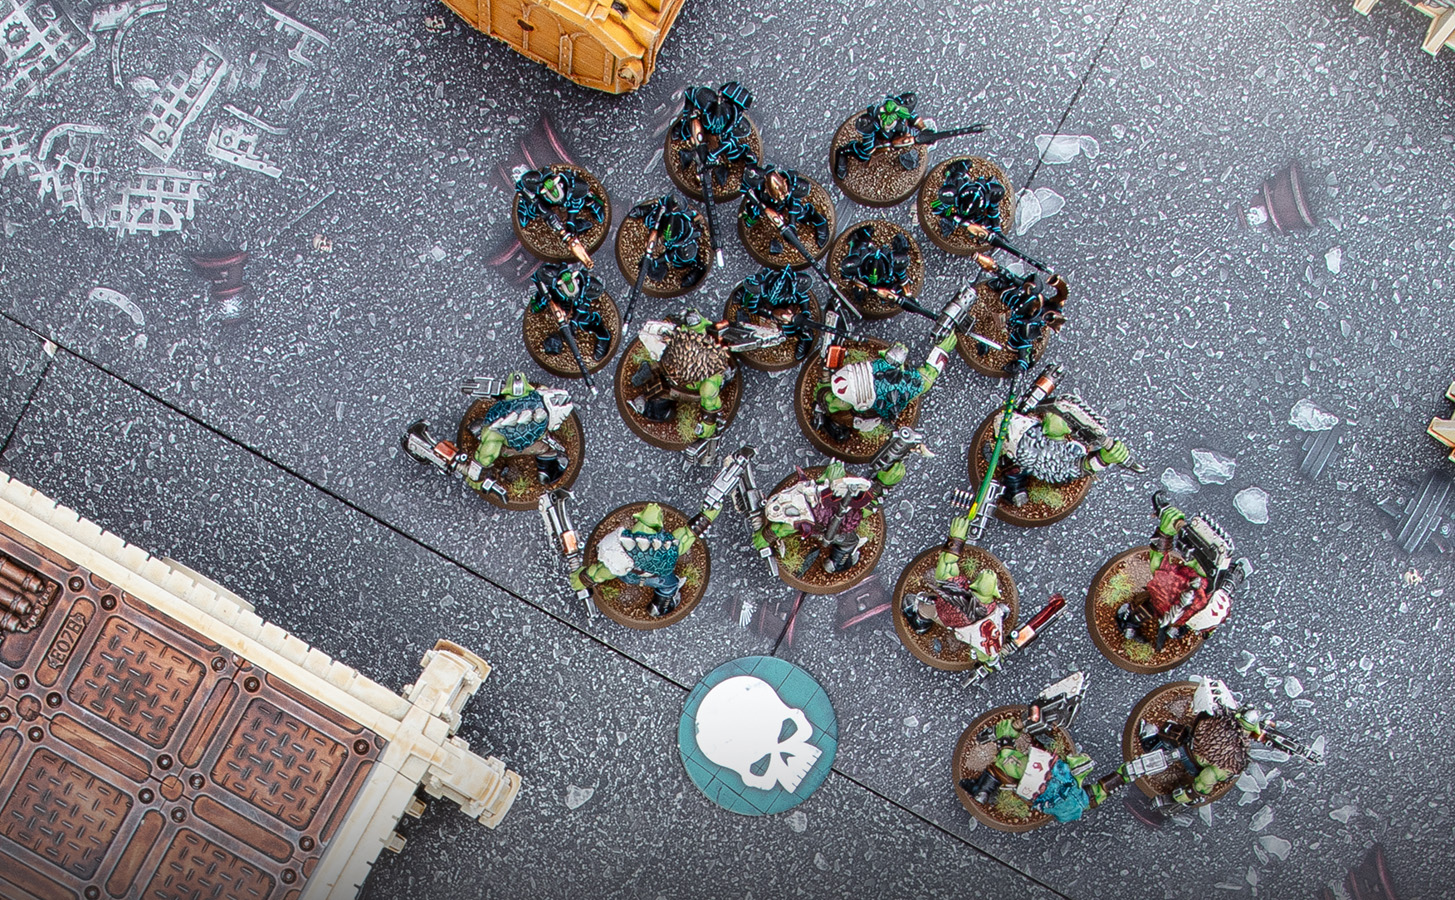
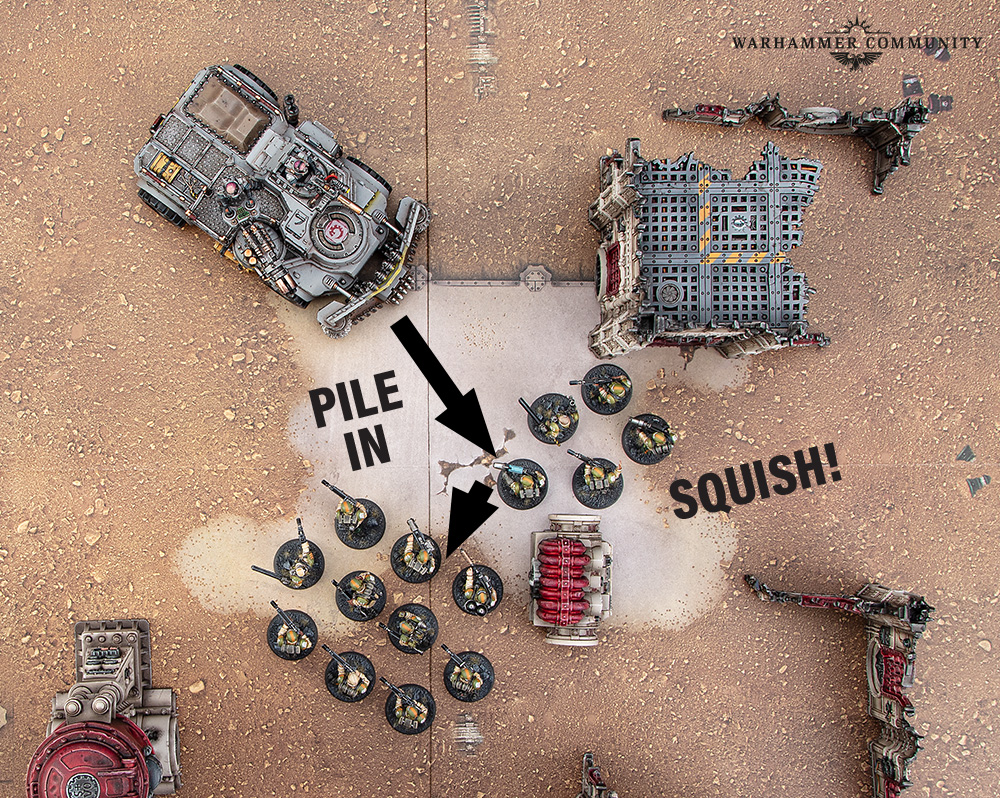
Things to do: make space!
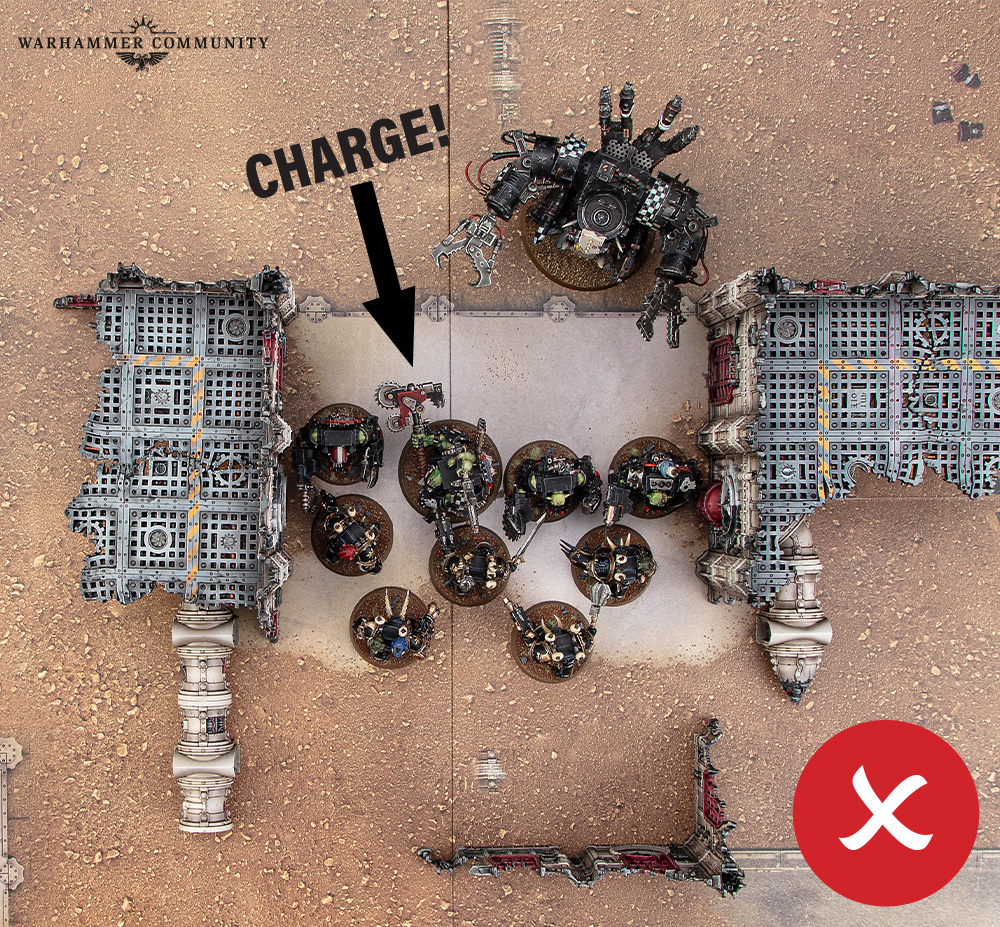

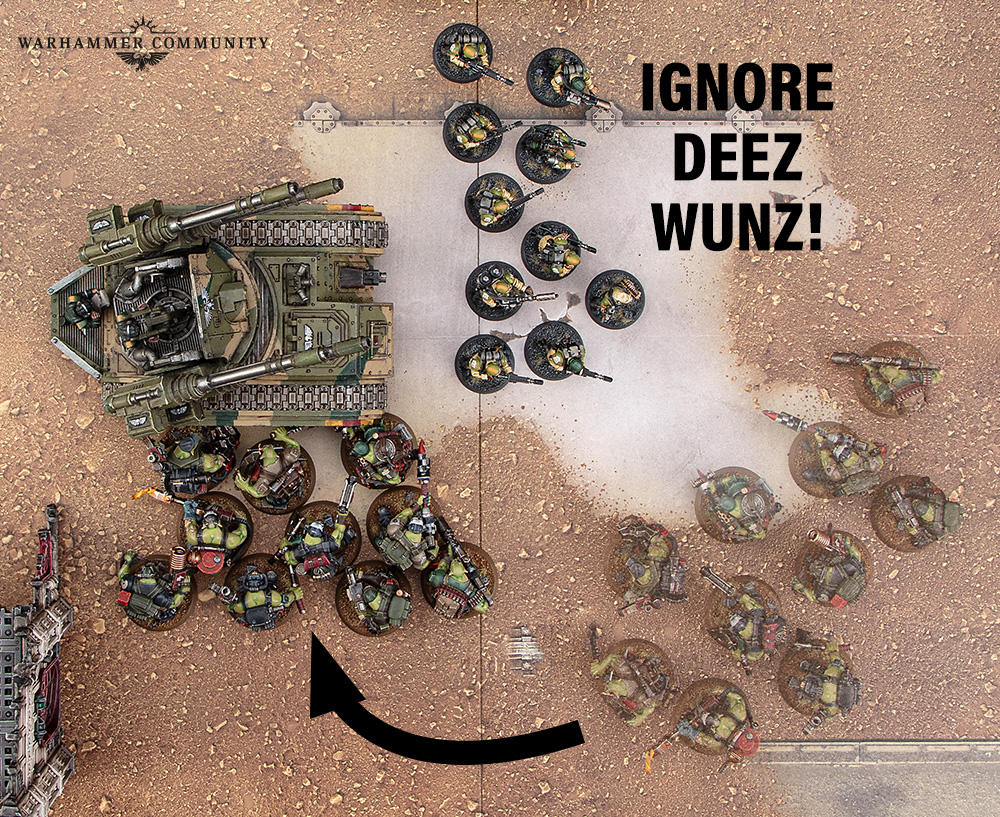
In the heat of the moment, it’s easy to declare a charge with the wrong unit first. Here, the Ork player charges their Warboss and Meganobz in first (because the boss goes first, right?) but then doesn’t leave enough space for the Deff Dread to fit in next to them. Losing those attacks could mean the enemy unit is not destroyed and an objective not taken.
Instead, charging the Deff Dread in first would be the better option. Then, the mega-armoured Orks can squeeze in beside it. They can then Pile In 3" around the Chaos Terminators so they can all fight. Another thing to consider is if the enemy decides to Fire Overwatch. Here they will have to target the Deff Dread, which will likely just soak up the shots.
Things to avoid: Fights First
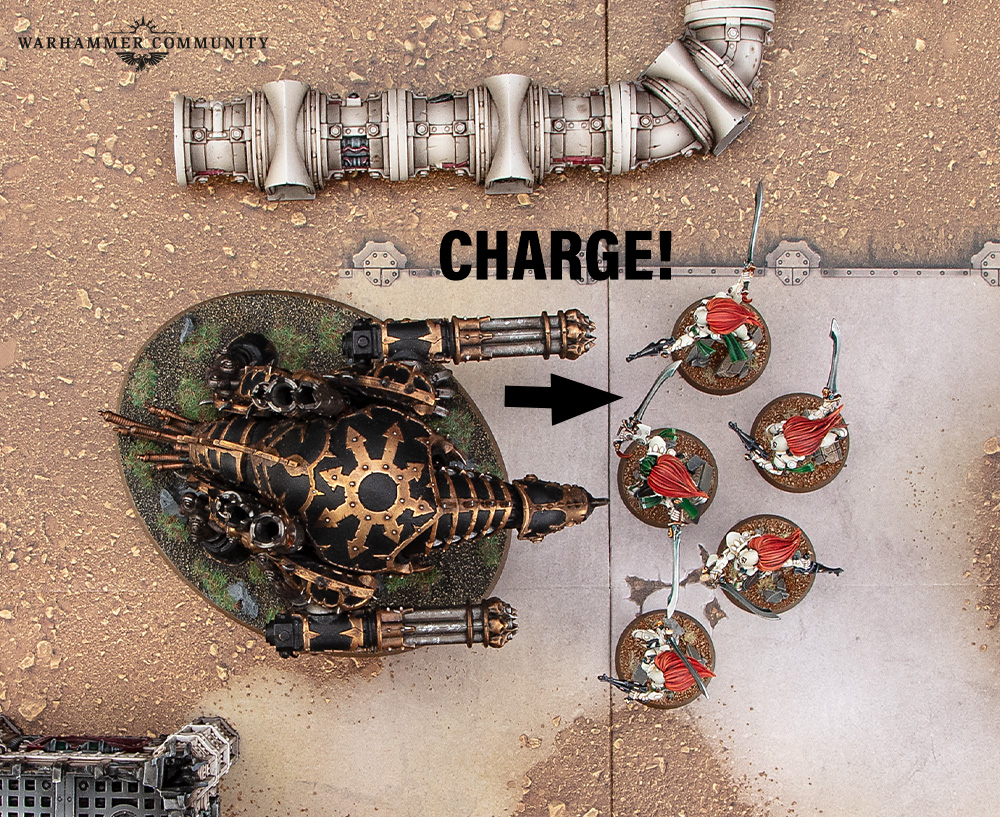
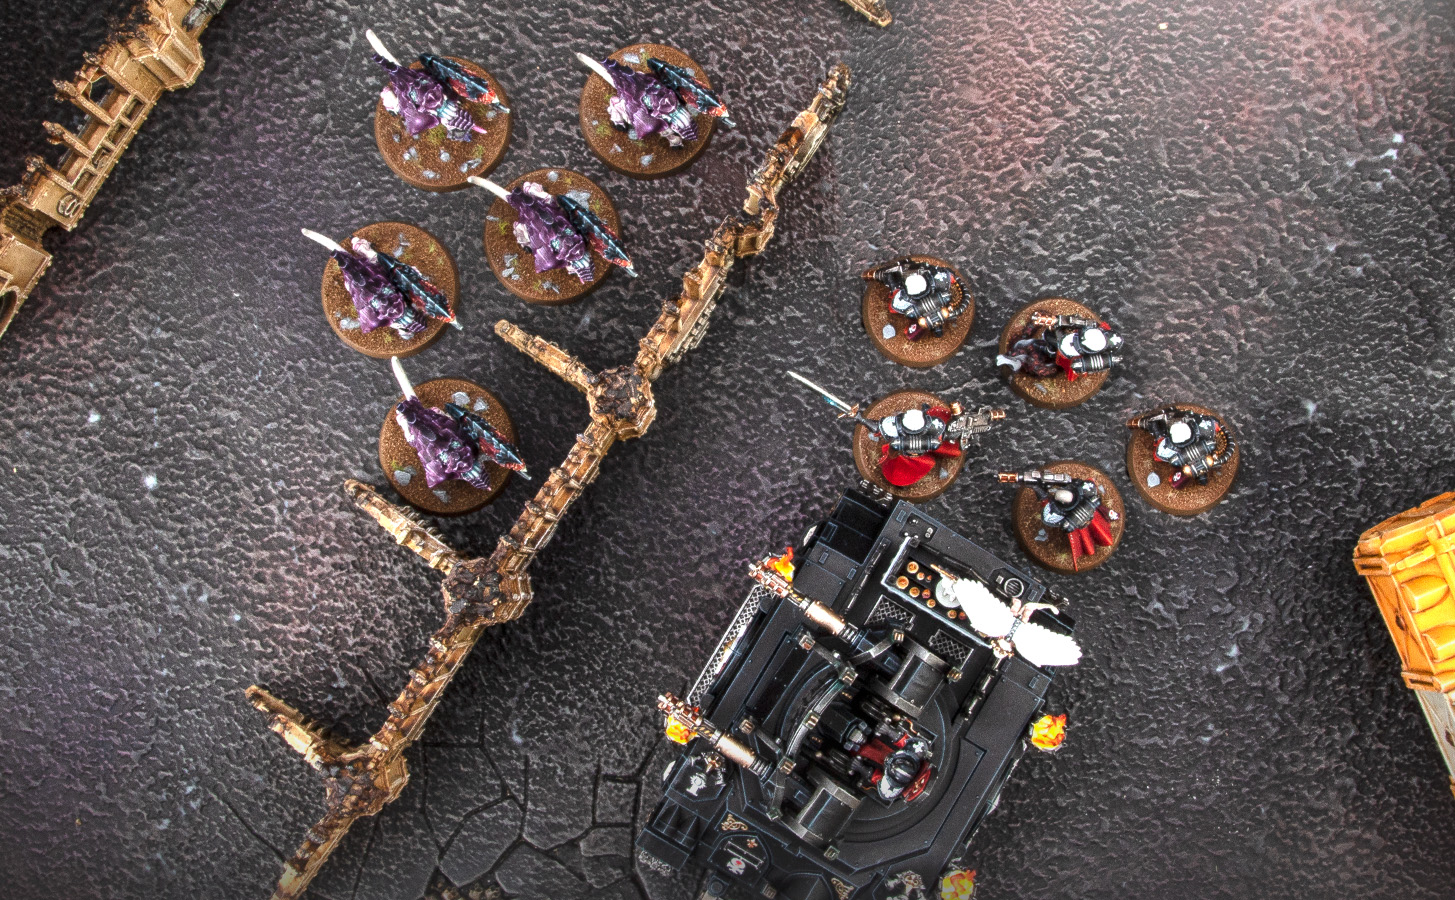
If your unit charges, it gains the Fights First ability. However, if one of your opponent’s units has Fights First naturally (Howling Banshees, Space Marines led by a Judiciar, Lelith Hesperax, Von Ryan’s Leapers, the Sanguinor, the Masque of Slaanesh, and so on) then they will get to strike before your charging unit. So you’ll either need to avoid them or be confident that your unit can weather the storm. For example, charging a Forgefiend into Howling Banshees should be a safe option, as they will be wounding it on 6s in combat and it has a 5+ invulnerable save. It should easily survive to fight back.
Things to do: get in the way
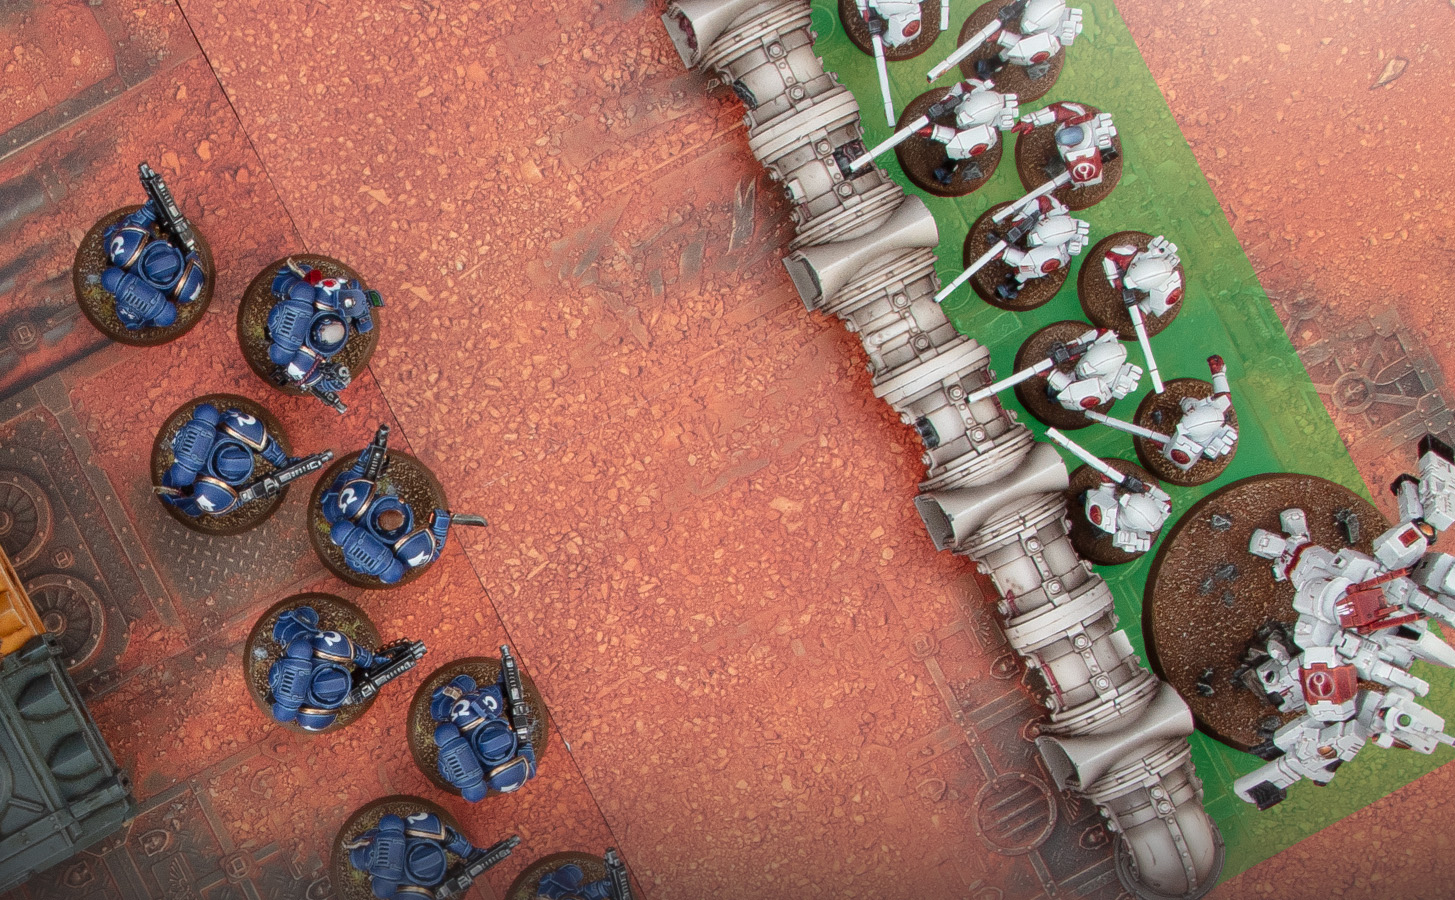
It’s good practice not to charge your units into things they can’t kill. However, there can be times when charging a tough unit can be beneficial. You could, for example, infiltrate a unit of Ork Kommandos and charge a Fire Prism, Hydra or some other shooty vehicle. That unit will then be at -1BS (at least a 20% reduction in effectiveness) if it attempts to shoot. Meanwhile, you can chip away at it with little fear of retaliation (a power klaw is handy for this kind of work). Sydonian Dragoons, Outriders, Gargoyles and Raptors are all great units for pinning down valuable but tough assets.
Things to do: steal an objective
Where there are objectives, there are normally enemy units standing around them. By protecting an objective with a unit, your opponent is, in fact, giving you the opportunity to get closer to that objective by charging (and even closer when you Pile In). Ideally, you’ll destroy the enemy unit in the Fight phase, but as long as your total OC is higher than theirs, you can claim the objective. Units that can inflict Battle-shock tests in combat are especially good for this job. Such terrors include Haruspexes, and World Eaters Daemon Princes with wings.
Things to avoid: shooting your target
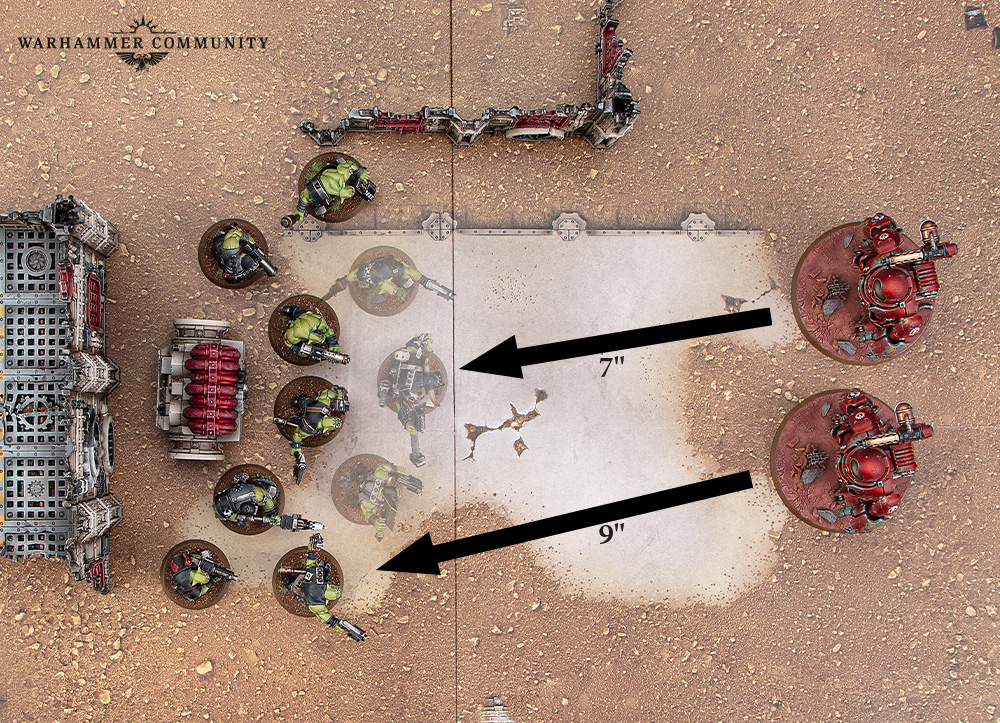
It may be that you decide to shoot an enemy unit before charging. However, a wily opponent may remove casualties from the front of their unit, thereby making your unit’s charge longer by an inch or more. This could be disastrous if the unit you’re intending to charge with deployed using Deep Strike (see below). Ideally you want your unit to be just outside Engagement Range to guarantee a charge. A useful trick is to calculate the charge distance to a character in a unit, as they will usually be the last model to be removed. If you need to be where that unit is (as in, they’re on an objective), it’s probably best not to risk shooting them.
Things to do: power up deep strike
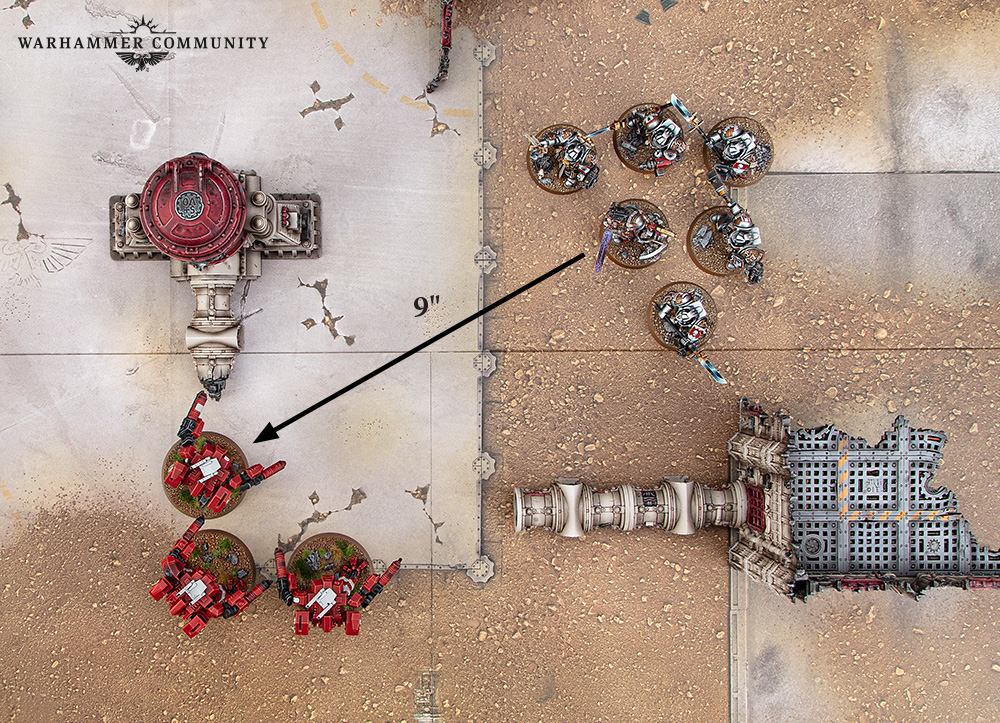
Deep Striking units have to deploy at least 9" away from all enemy units, which makes for a risky charge – less than a 28% chance of success. If you shoot that enemy unit (as above), the chances could be reduced to 17% or worse! Units, abilities and characters that improve your charges are hugely beneficial. For example, Einhyr Champions give their unit +1 to charge, and the ’Ere We Go Stratagem for Orks gives +2. Failing that, keep a CP spare for a Command Re-roll.
Things to do: mortal wounds
Some units, such as the Skorpekh Lord, Einhyr Champion and Megatrakk Scrapjet, cause mortal wounds on the charge – a useful way of thinning out (or even destroying) a unit. Vehicles also have access to the Tank Shock Stratagem, which can cause up to 6 mortal wounds on the charge. Combine this with abilities such as the Brutalis Dreadnought’s Brutalis Charge, and you can cause serious damage. With careful positioning, you could wipe out one unit by inflicting mortal wounds, then Pile In to another unit within 3" to fight it in combat.
Things to avoid: heroic intervention
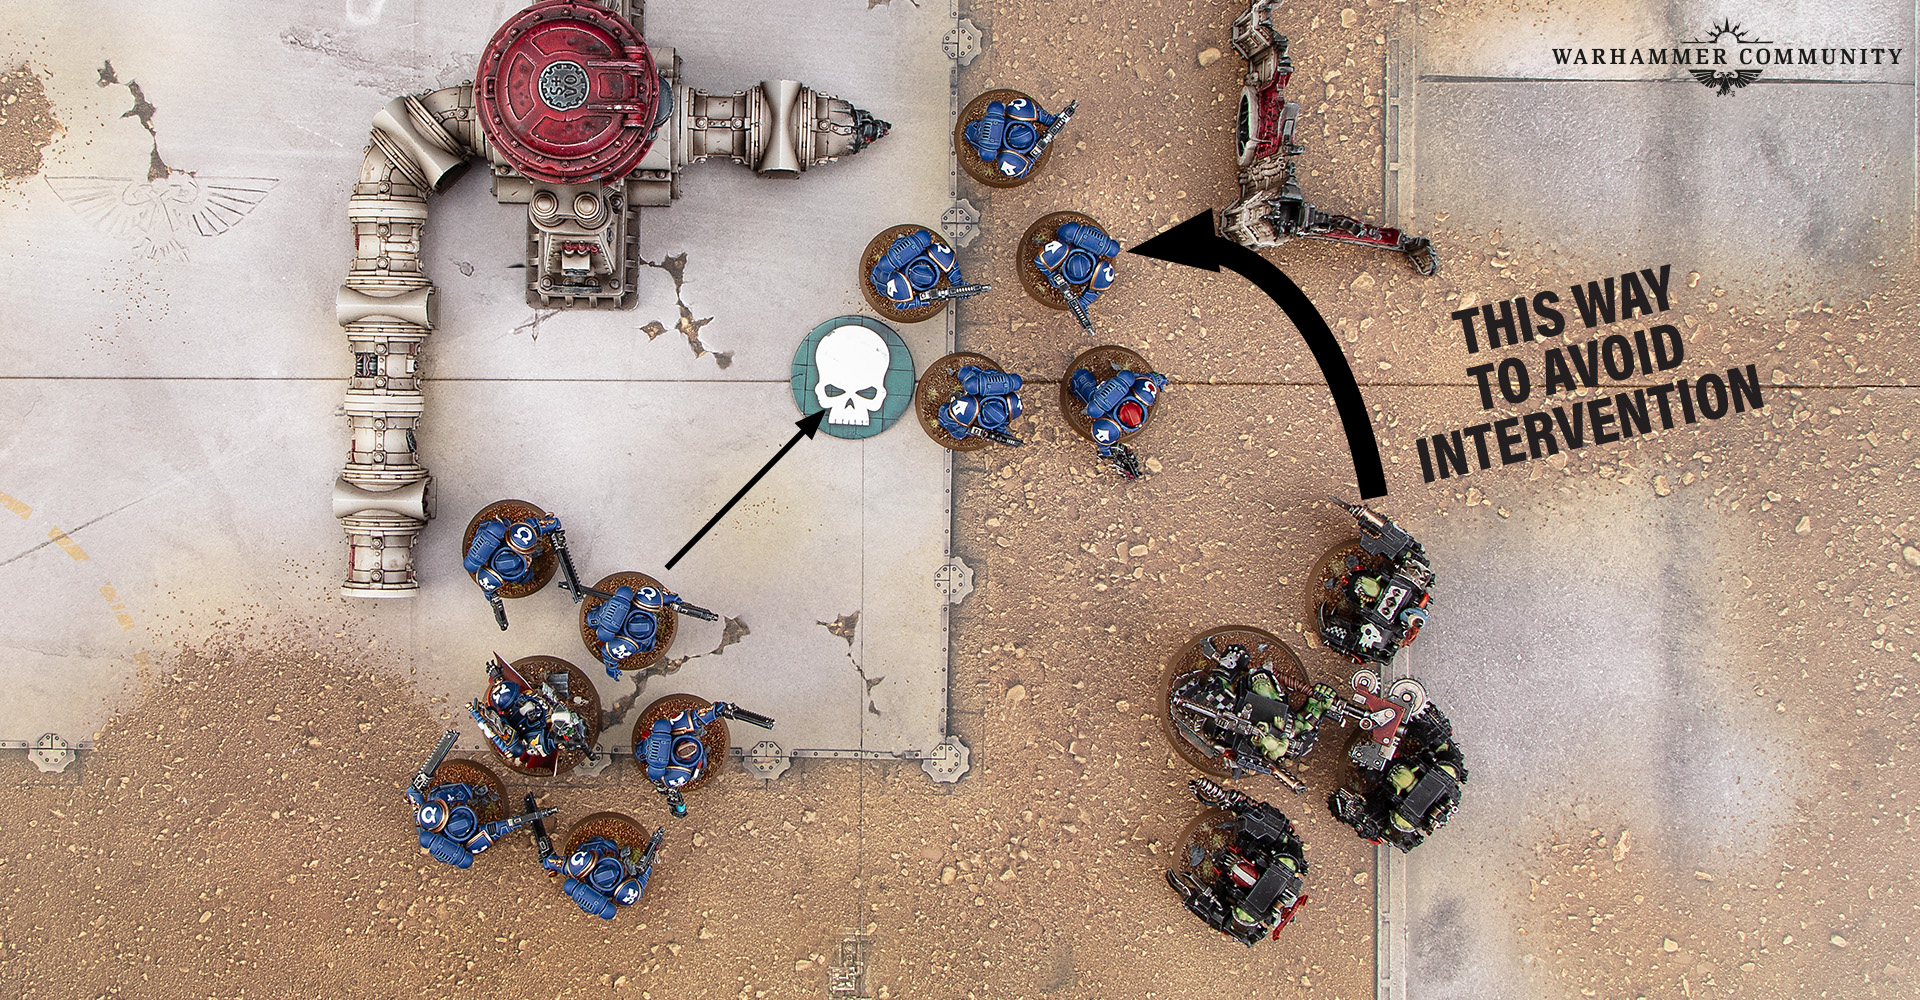
The Heroic Intervention Stratagem enables your opponent to make a Charge move with one of their units after you have made a charge with one of yours. This means you could charge your unit onto an objective to claim it, only to find it counter-charged by a unit with a higher OC. This Stratagem is expensive at 2CP, but there are plenty of units that can do it for 0CP. An easy remedy is to charge the unit that might try to intervene. It’s also worth remembering that you can use Heroic Intervention to charge your unit away from unfavourable foes to make their charge harder.
Stephen Box is a veteran Warhammer 40,000 player and a master tactician. He runs Vanguard Tactics, a website that helps people to think critically while remaining composed and confident in their ability to play Warhammer 40,000.
More in White Dwarf
A version of this article was originally published in White Dwarf issue 498. You can find in-depth content like this every month, so there's never been a better time to subscribe.
subscribe now