It may come as a surprise, but the Shooting phase is rather important in Warhammer 40,000 – after all, it’s where all the dakka goes, and we have it on good authority that the appropriate amount of dakka is always ‘more’. To help you get a better grip on this critical part of the player turn, we’ve delved into the White Dwarf archive for some competitive insight from Warhammer 40,000 player Stephen Box.*
Stephen: The tenth edition of Warhammer 40,000 evolves the game to its best incarnation yet, and nowhere is this more evident than in the Shooting phase, where strategic mastery and tactical finesse reign supreme! In this two-part article, we’ll explore essential topics that have an impact on ranged combat, including movement and shooting, terrain and cover, visibility and stealth, threat ranges, and the order of shooting. Our goal is that you walk away with some useful insights that will enhance your play experience and make you a more competent general.
Movement and Shooting Dynamics
Movement plays a crucial role in the Shooting phase of Warhammer 40,000. Understanding how different types of moves affect shooting accuracy and employing effective strategies can give you a tactical advantage on the tabletop. By carefully considering the impact of different moves, utilising Assault and Heavy weapons effectively, mitigating accuracy penalties, leveraging shoot-after-advancing abilities, exploring faction-specific strengths, and understanding tactical synergies, you can dominate the battlefield and secure victory.
Good luck, wargamers – may all your shots hit on a 2+.
Remain Stationary for Accuracy

Remaining Stationary provides a significant benefit if your weapon has the Heavy rule, as it conveys a +1 bonus to your Hit roll. Just remember that the whole unit has to Remain Stationary for this to kick in. One unit that can make excellent use of this is Eradicators. Their melta rifles and multi-meltas have the Heavy rule,
which means that, if they Remain Stationary, they will hit on 2+ and 3+ respectively (that’s 83% and 67% accuracy). With their unit ability that allows them re-rolls to wound against Monsters and Vehicles, they are lethal if you pick the right target for them.
Rapid Fire on the Move
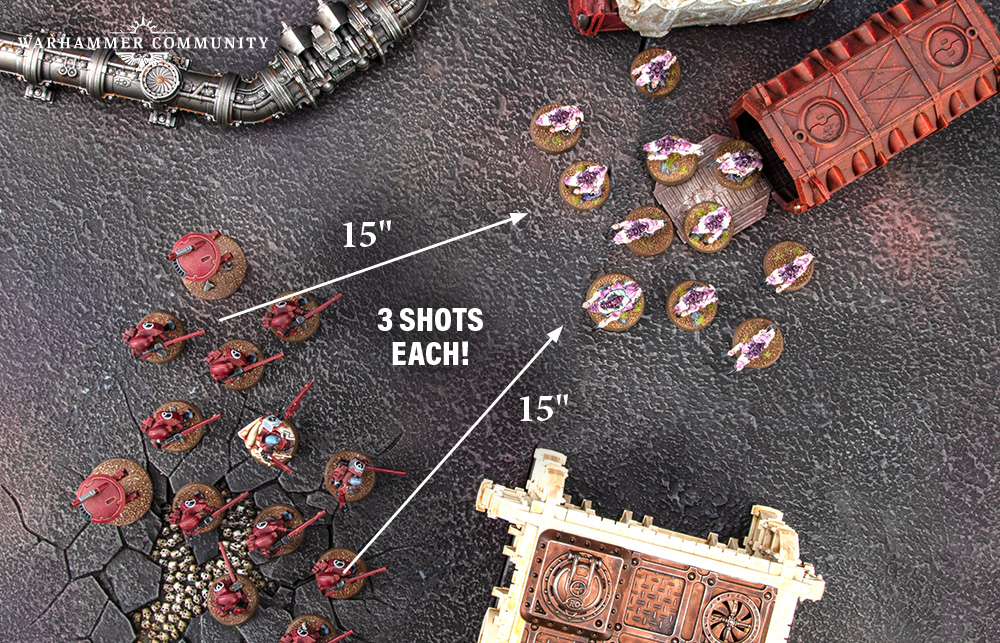
Sometimes moving can be beneficial, especially if your units wield Rapid Fire weapons, which grant you extra shots if you can move to within half the weapon’s range. That’s 100% more shots for weapons like lasguns and pulse rifles, so well worth getting close if you can guarantee a kill. Keep an eye out for abilities that can boost the output of those shots even further. For example, the T’au Fireblade’s Volley Fire rule also adds 1 to the Attacks characteristic of ranged weapons, while a Dakkajet’s rapid-firing twin supa-shootas score Critical Hits with every hit, all of which benefit from Sustained Hits 1. Eurgh!
Unlocking Assault Weapon Potential
Assault weapons enable a unit to Advance and still fire those weapons. Some Assault weapons also possess additional rules like Melta, which inflicts extra damage if you can reach half range. Be mindful of where you place such weapons in a unit so that they are close enough to the enemy to benefit from these abilities. At the same time, be wary of fast-moving units such as Scourges that have access to Assault weapons. With a Movement of 14", a potential 6" Advance and 18" range on their blasters, shredders and heat lances with Melta 3, their threat range and damage output are both huge.
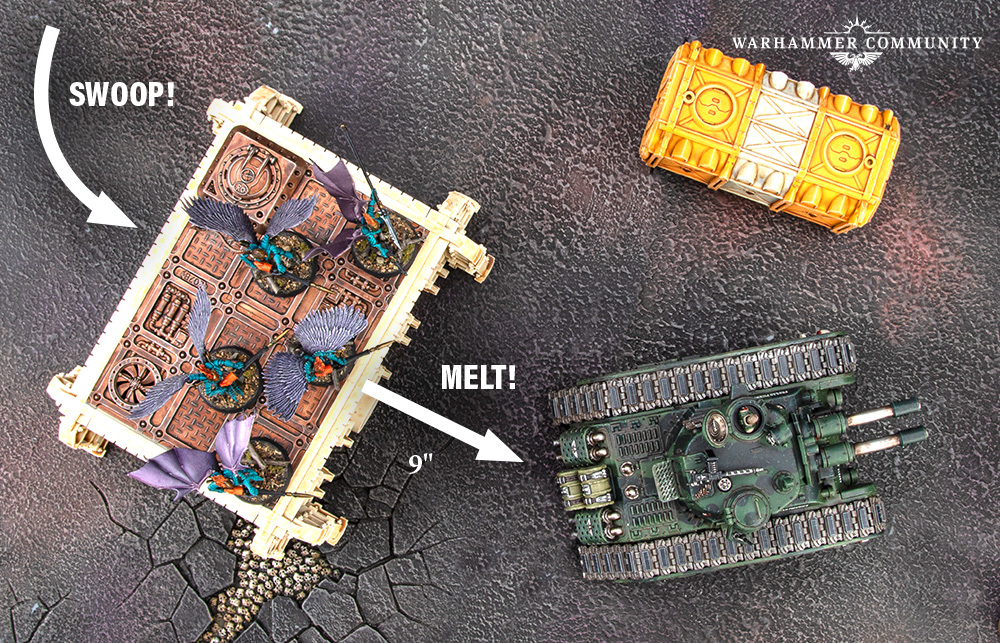
Move After Shooting

The ability to make a move after shooting opens up several tactical possibilities. Use this ability to fire and then move behind terrain, making yourself less susceptible to return fire, for example. Or, after clearing a unit off an objective, leverage the extra move to secure that objective for your forces. Another effective approach is moving, shooting, and then moving again to achieve Secondary Missions like Engage on All Fronts or Behind Enemy Lines. Gargoyles are especially good at this as they can move 12" plus their Advance roll, still shoot (thanks to their Assault weapons), then use their Winged Swarm ability to move out of charge range or onto an objective.
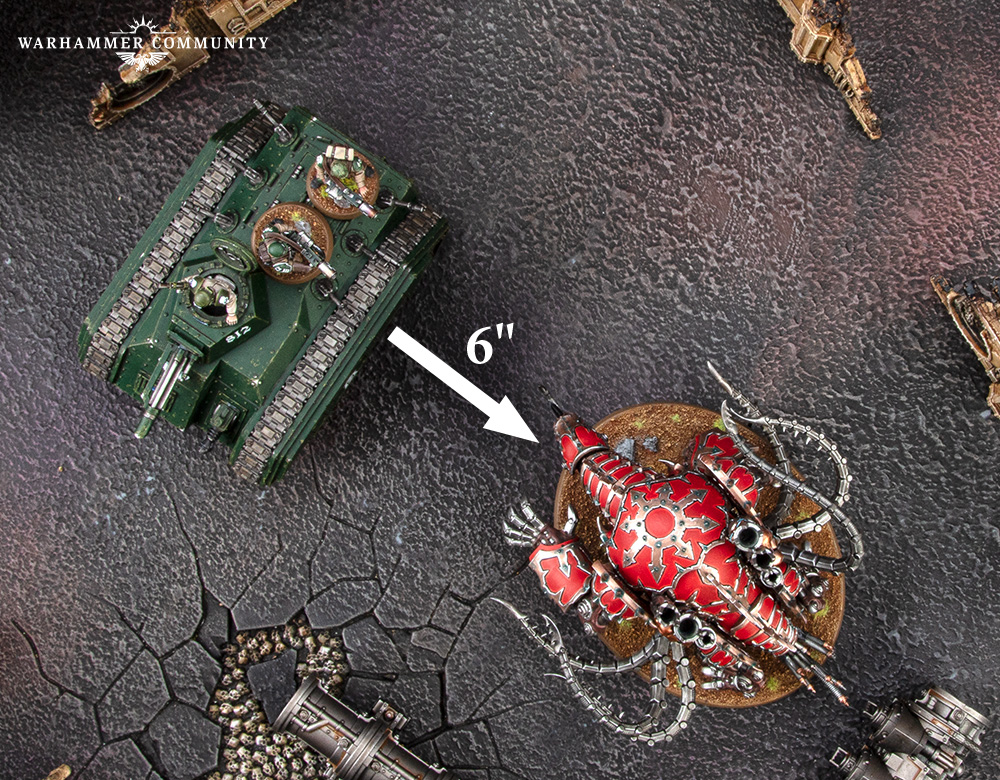
Transports and Fire Support
Some Transport vehicles provide shooting bonuses to units that disembark from them, making the order in which you shoot critical. This rule is generally known as Fire Support and can be found on the Goliath Truck and Falcon. If your Transport vehicle scores a hit on the enemy unit (not even a kill!), your disembarked squad will be able to re-roll their Wound rolls.
Transports and Firing Decks
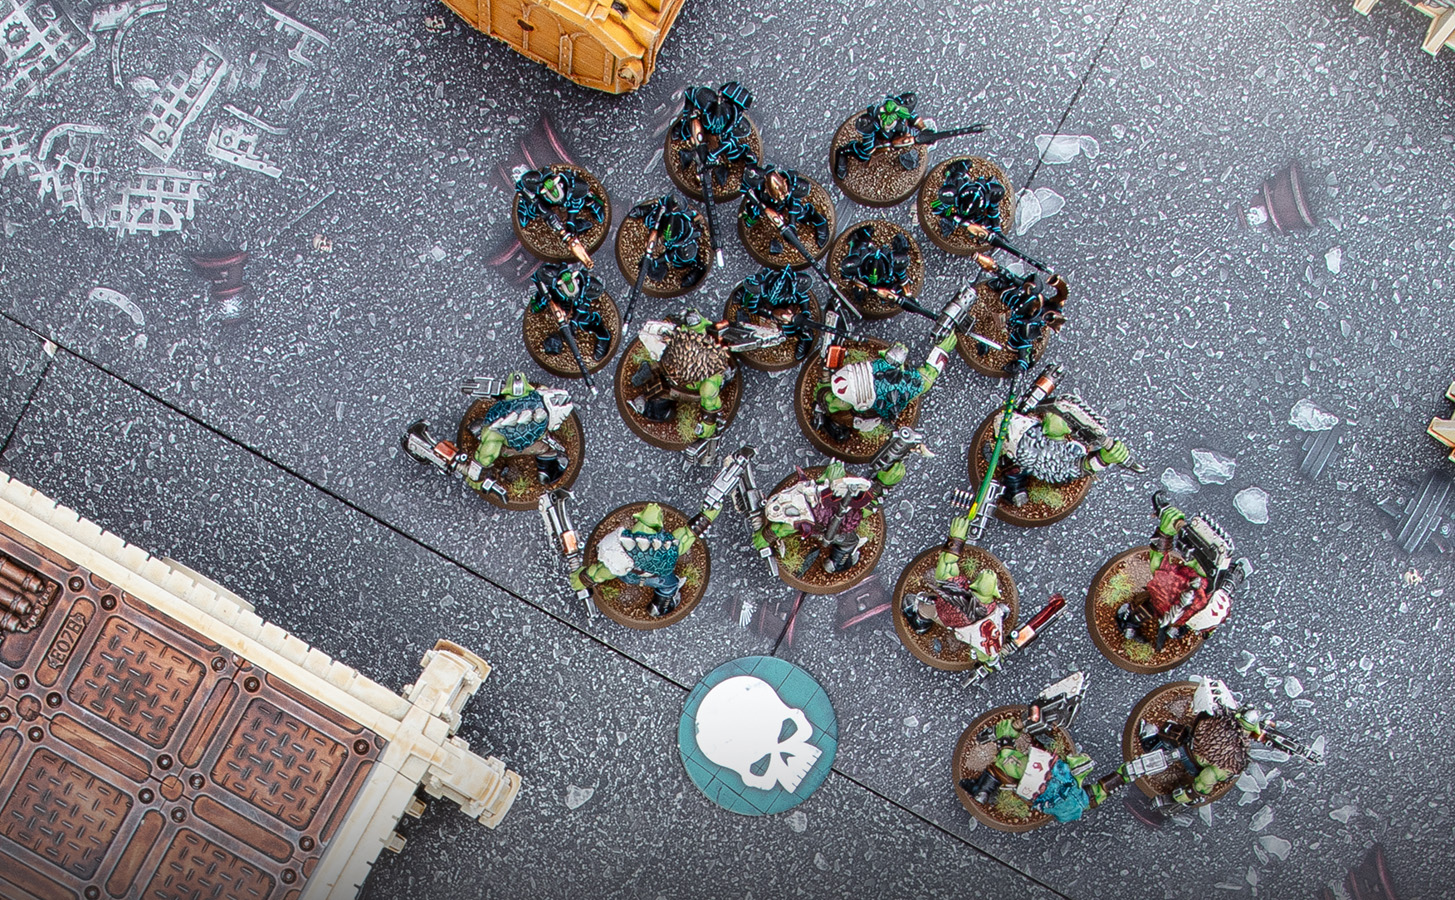
Some Transport vehicles have the Firing Deck rule, which enables some models to shoot while embarked. This is especially useful as it enables the embarked unit to make the most of the vehicle’s movement to get into a beneficial position, then add their firepower to that vehicle’s shooting in the Shooting phase while being protected by the vehicle’s armour. Ork Trukks and Drukhari Raiders are the prime examples of this (admittedly the Drukhari are much better at shooting), though the Chimera also has this rule, which means you could fire up to two weapons (meltaguns or lascannons would be nasty) out of the top hatch.
The Move-Shoot Combo Attack
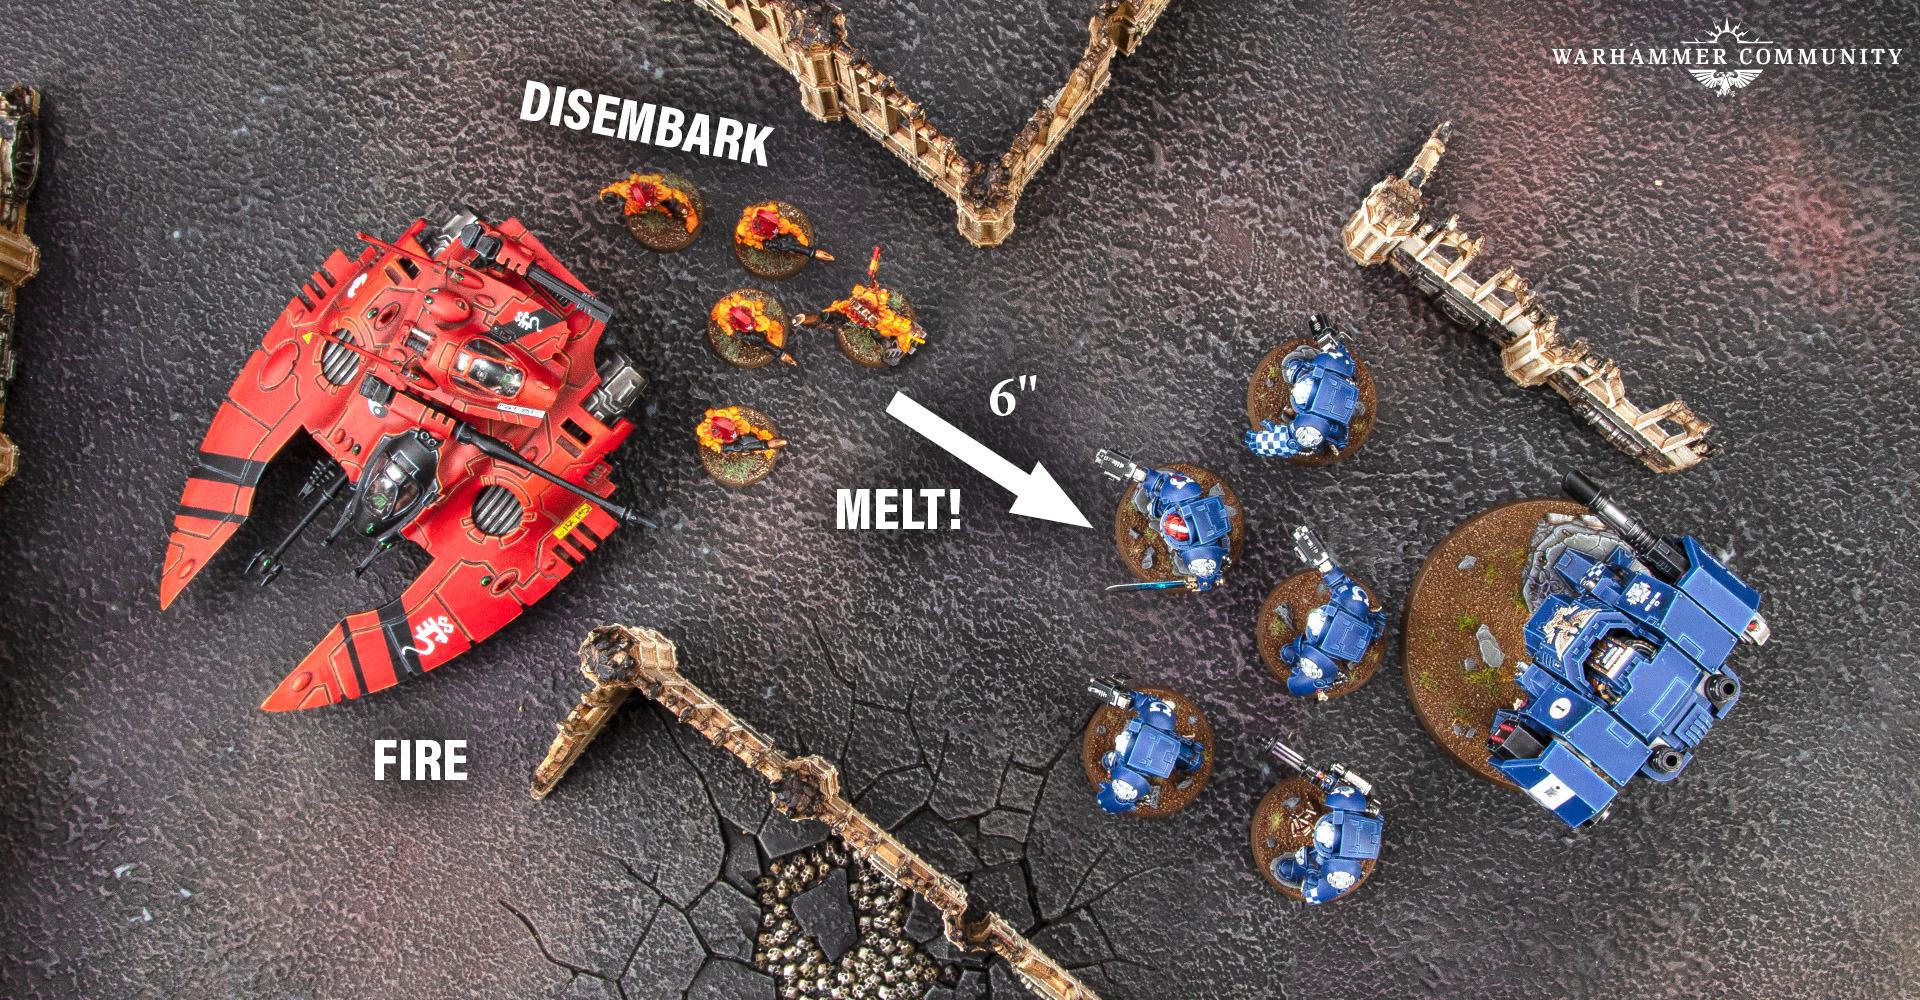
Let’s put a combination of these rules together. I’ll use a unit of Fire Dragons in a Falcon as my example. The Falcon can move up to 20" if it Advances, so you can get your Fire Dragons into position early on. In the second battle round, you can then disembark your Fire Dragons up to 3" from the Falcon. They have a move of 7", plus up to a 6" Advance, plus the 12" range of their fusion guns, which have the Assault rule. This gives them an effective range of 28" – though ideally 22" to make use of their Melta 3 guns. You’ll also get re-rolls to wound if the Falcon fires at the target first.
Stephen Box is a veteran Warhammer 40,000 player and a master tactician. He runs Vanguard Tactics, a website that helps people to think critically while remaining composed and confident in their ability to play Warhammer 40,000.
more in white dwarf
A version of this article was originally published in White Dwarf issue 492. You can find in-depth content like this every month, so there's never been a better time to subscribe.
subscribe now
A version of this article was originally published in White Dwarf issue 494. You can find in-depth content like this every month, so there's never been a better time to subscribe.
* A few minor changes have been made for clarity.